Making Cyanotype Prints in the Kitchen
I’ve recently discovered cyanotype printing, a process discovered in 1842 by Sir John Herschel… because I’m obviously the last guy to hear about anything. Herschel used the process to reproduce texts and diagrams, like a 170-year-old Xerox machine, however the process was also used to make photographic contact prints. The third oldest means of making photographic prints, preceded by Daguerreotype and Talbotype. I love trying new things, so I thought I’d give it a whirl.
There are several kits available to do this, but the whole process is super simple, embarrassingly simple. You can display your prints and all your cool friends will marvel at your feats of archaic know-how, despite this being the easiest print you’ll ever make.
At the core of the process is a solution of a light-sensitive mixture of two chemicals – the light-sensitive iron(III) complex with a readily oxidizable polybasic carboxylic acid, usually citric acid or oxalic acid, and hexacyanoferrate(III). Known to non-technical me as “Solution A” and “Solution B.” You can apply this to cloth or paper, or probably a multitude of other surfaces, expose it to sunlight, and create an image from the resulting silhouette of whatever you placed on top of it.
The chemistry comes in two bottles, as a powder. You need to fill these bottles with water (I used distilled water, because why not?) and shake the snot out of them to mix everything well, then wait 24 hours to use, because the package says “For best results…” and who goes into a thing like this with lofty plans for mediocre results? 24 hours later I’m ready to go!
I experimented with some Bristol paper first, because that’s what I had. I would recommend using a heavier watercolor paper, I later bought a pad of Arches watercolor paper, in the “hot press” variety, because the surface is smoother than cold press. A smoother surface translates to better detail in your photo. Using a small glass bowl and a pair of glass medicine droppers I combined an equal amount of light-sensitive iron(III) complex with a readily oxidizable polybasic carboxy… I mean “Solution A” with “Solution B,” then mix with a foam brush and apply the solution to the paper.
When applying, I didn’t go edge-to-edge, as I really like the appeal of the unpolished rough edges in the resulting image, this give it a more interesting look. I’ll be experimenting with this in the future as well. The DIY aspect of this process gives you a lot of latitude for creativity. You want to do this in a darkened room, out of direct light as it is now light sensitive. Subdued light is fine, like with drawn curtains, it doesn’t need to be as strictly dark as with other photo papers. Let it dry completely.
Once dry, you can go on to the exposure. For this you need a source of light, either direct sunlight or a UV lamp. You’ll also be better off using a picture frame to hold everything flat, but using masking tape on a flat surface would also work, but a picture frame with clean glass will hold everything perfectly flat. Finally, you need your negative. Buy some clear printer media, plastic sheets used for overhead display transparencies, it’s not very expensive so get a bunch of it. Bring a black & white image into your photo editor of choice (or convert a color image to b&w), and use the “invert” filter to turn it into a negative image. Print it onto the correct side of the transparency sheet and you now have a large-format negative. Lay it on top of the treated paper and expose it for… well, who knows? This is where you need to experiment. I used a 10-volt UV lamp for 7 minutes and got a faint image, eventually I would find my sweet spot between 20 and 25 minutes.
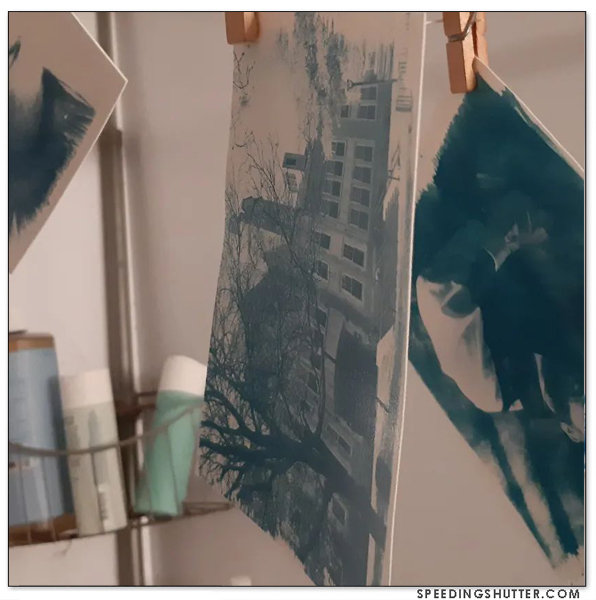
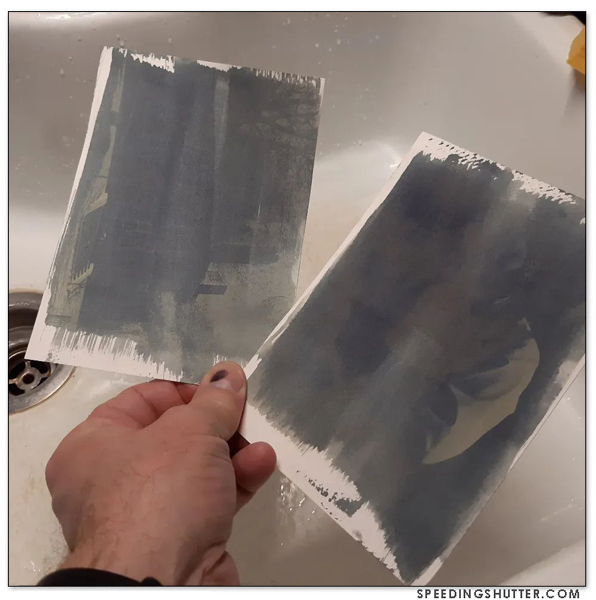
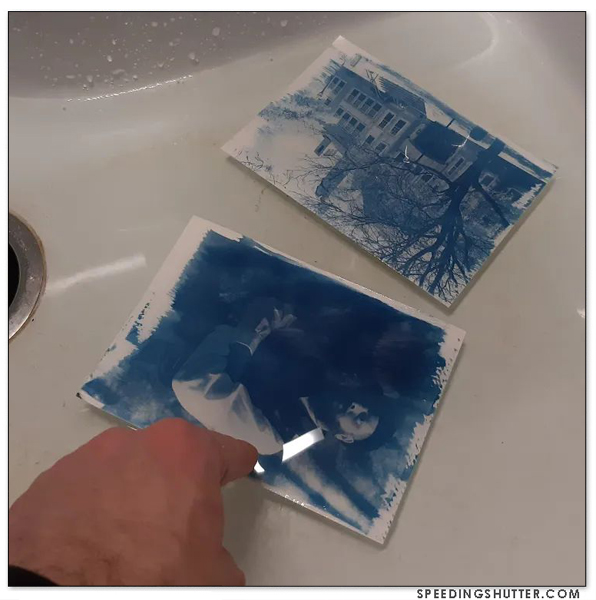
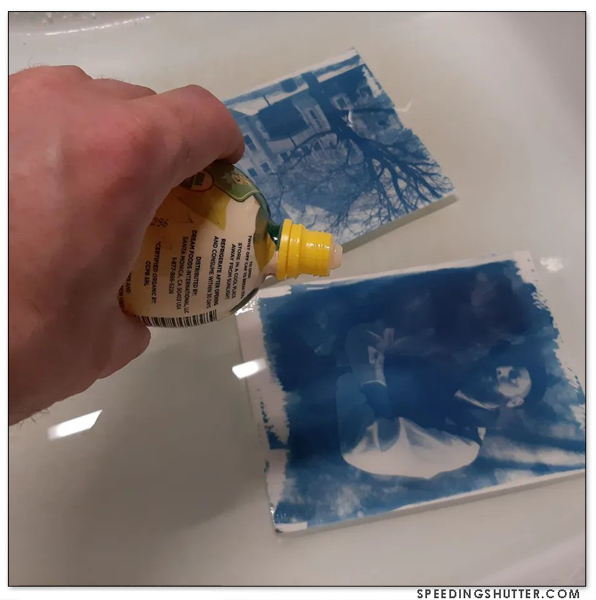
Once exposure is complete, immerse the print into a tray of cool water and agitate for a few minutes to wash away much of the bronze coloring until you’re left with that Prussian Blue tint. You can amplify this coloring with a few drops of light acid – hydrogen peroxide, citric acid, vinegar, lemon juice, that sort of thing. Carefully remove from the tray of water and hang it to dry with a clothespin on a string. Just like when you hang prints to dry in the darkroom (and if you haven’t done this, well you should try it sometime. Making prints in a darkroom is fun!).
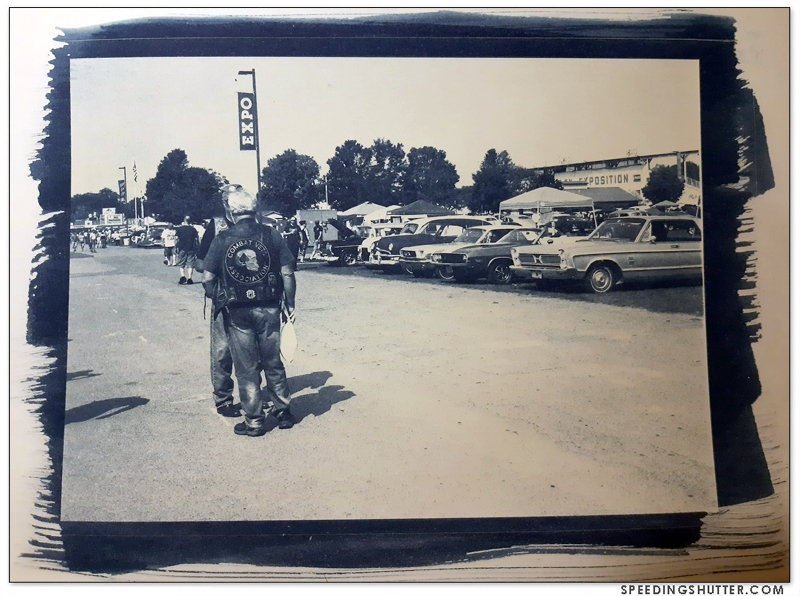
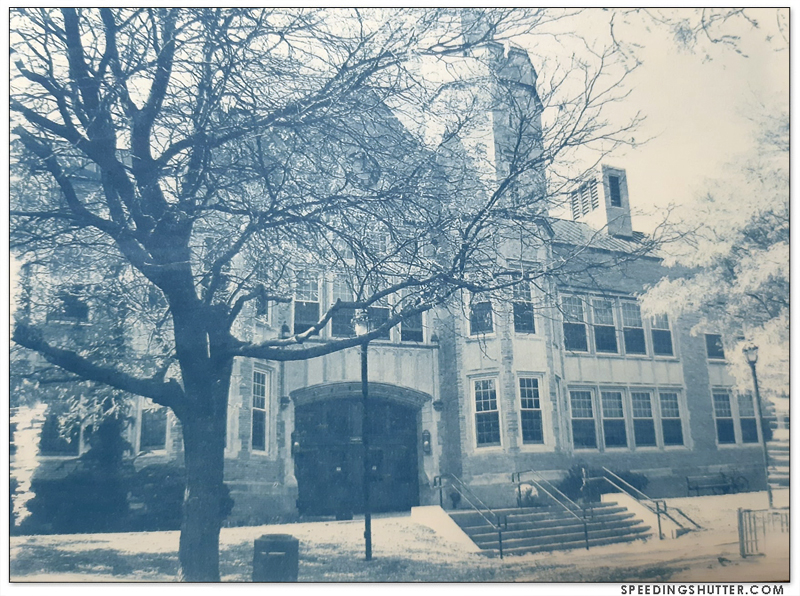
The final image will look best after it’s had time to completely oxidize. Easy, right? Minimal effort, minimal cost, no enlarger necessary. No fumey toxic chemicals, either. I dream of a day when I can experiment with collodion processing (a technology that was born a decade later than cyanotype) negatives shot on a large-format Graflex field camera, but that’s a much bigger jump from where I’m at, technically-speaking. In the meantime, I’ve been enjoying my embrace of this old timey photo tech described above. It doesn’t work with every photograph, images without much contrast or detail tend to come out muddy. Landscape images that don’t translate well in b&w won’t do any better in cyanotype.
Costumed portrait shoots in 400-year-old cities, however? Perfect.