Developing Film in the Living Room
When I first got back into film photography a number of years ago, people would ask “Do you develop your own? Do you have a darkroom?” I’d tell ’em that my darkroom gear is in a tote in the basement, and that it’s more cost effective and less time-consuming to just take my film to be processed elsewhere. That seemed to make sense.
Until I thought about it, you know what ELSE is more cost-effective and less time-consuming? Shooting with a cell phone camera instead of an analog one. I chose to shoot analog because it seemed fun, it has a process, and it has rules. If I apply the same reasoning to the creation of the photos, and not just their capture, it stands to reason I should also enjoy the developing.
I took a trip to the basement, where I stored my darkroom equipment in the early 2000’s, to see what was salvageable. I found my developing tank and reels, perfectly fine. Graduated measuring cylinders? Perfect. Light-proof film changing bag? Eh, not so much… the elastic in the sleeve openings had deteriorated, I’ll need a new one. Some other odds and ends later I was coming back upstairs with a much smaller shopping list than I expected.
I opted against doing the printing of the photos from negative onto paper. The enlarging equipment takes up a good bit of space, takes a lot more time than I want to expend, and the photo paper is another expense I could stand to avoid. Perhaps one day, but for now I will just develop the negatives and scan them into my computer.
This takes me to the next issue, what do I scan them with? I first tried using a cheaper film scanner that saves right to SD card. It was easy, but the photos were not great. There was a loss of sharpness and detail, and all the colors seemed off. So I invested in an Epson Perfection V600 flatbed scanner. There are higher quality options out there, but this one seemed to be the best option under $400 that did both 35mm and 120 film. I remain pleased with it.
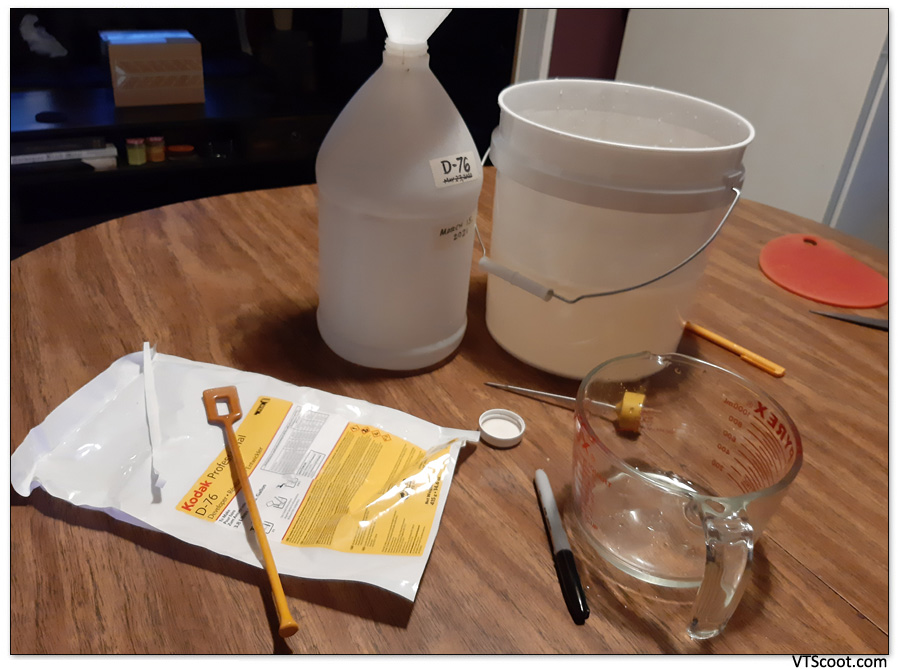
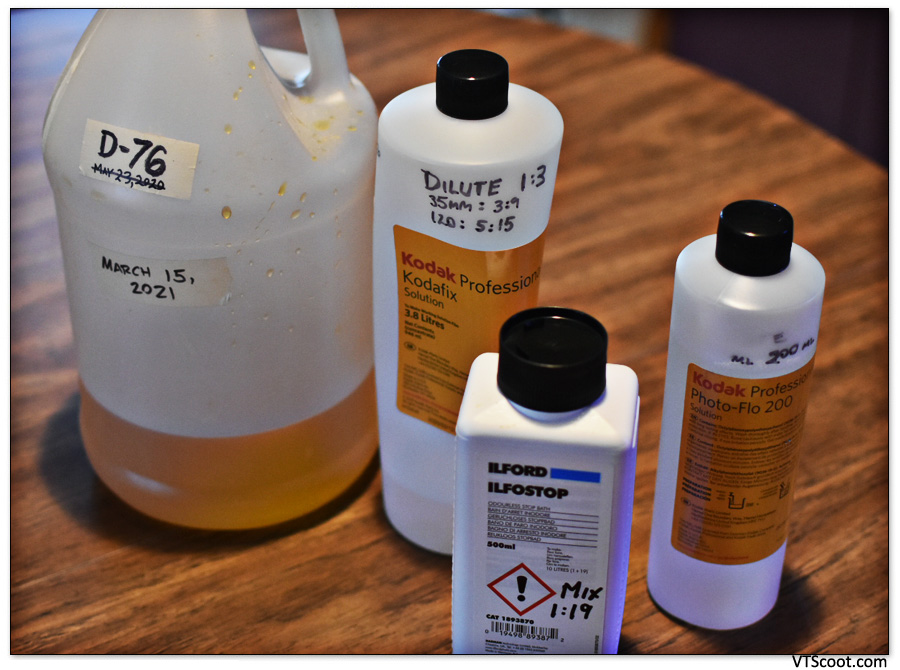
Now I need chemicals. Color and B&W both use different chemicals. Color chemistry uses a slightly different process, and the chemicals are a bit more smelly and, quite honestly, I have no experience using them. So for now I’m only going to process my B&W films, and send out my color. This requires a developer, a stop bath and a fixer. I also bought a chemical called “Photoflo” which enhanced the drying process. The need for a chemical called Hypo Clearing Agent can be negated by a half-hour rinse under the sink. More info than necessary, let’s move on.
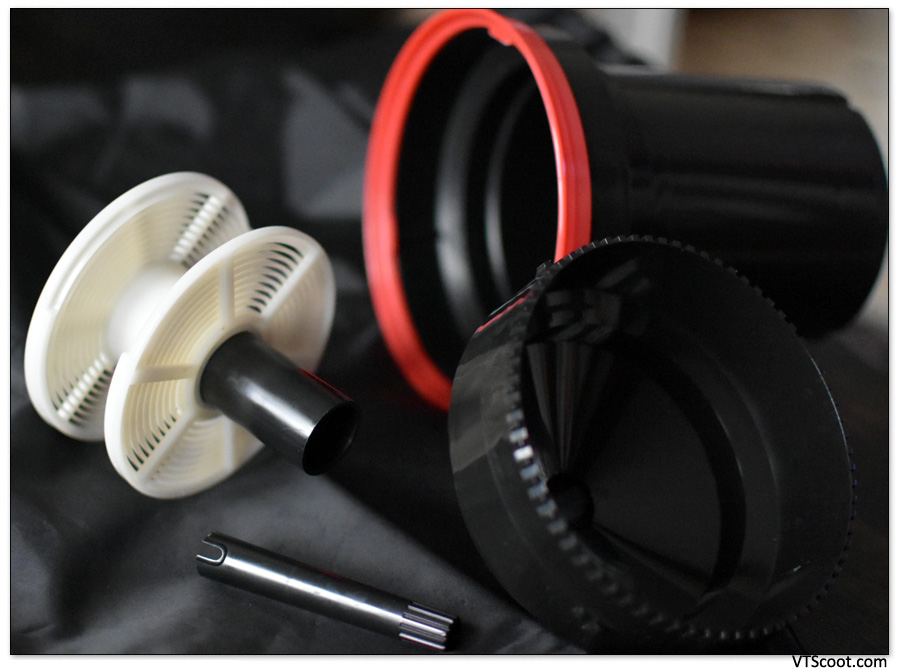
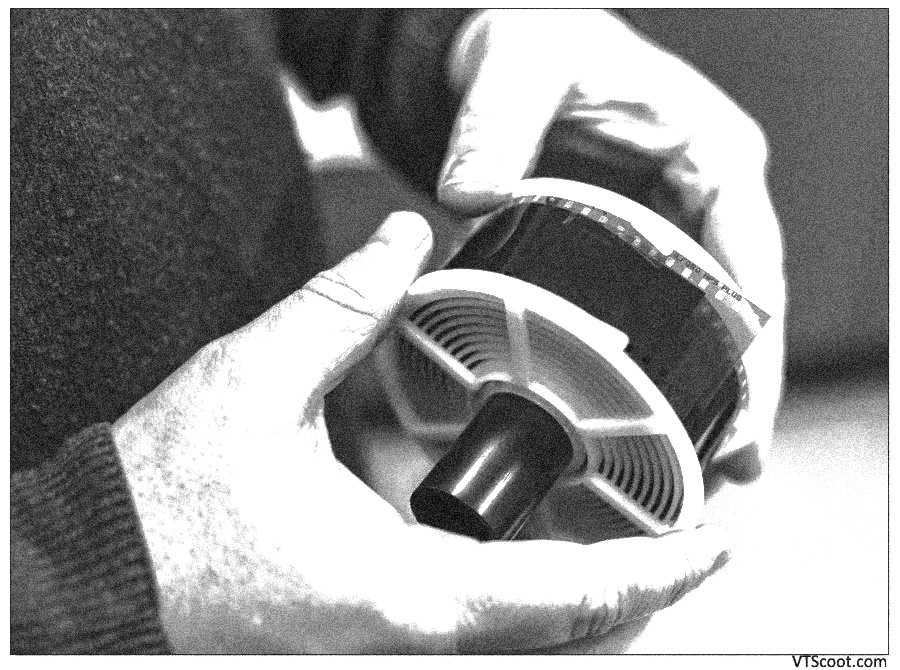
First we have to remove the film from the metal cassette (for this example I’m only going to discuss 35mm processing) and spool it onto a plastic spool with a spiraling track that keeps the film surfaces from touching. I do this in a changing bag, a light-proof nylon bag with two sleeves your arms go into. In this bag, completely blind and relying on touch alone, you crack open the film canister, snip the end flat, work it onto the spool, then close the spool into the plastic or metal developing tank. It takes practice, find a how-to video (or just click the link to one I went ahead and found for you) and sacrifice a cheap roll of film to use as a practice strip out in the open.
That done, we’re on to the wet portion of the process. Before I mix chemicals I pour 11 or 12 ounces of distilled water into the tank with the film. just to wet the film and remove any surface tension, not required but it’s what I do. First chemical used is the developer, of which there are dozens and scores. I use either Kodak HC-110 or Kodak D-76. Lately I’m partial to D-76 because I love the sharper definition it creates. I mix the stock solution with water one-to-one and bring the temperature down to 20 degrees Celsius.
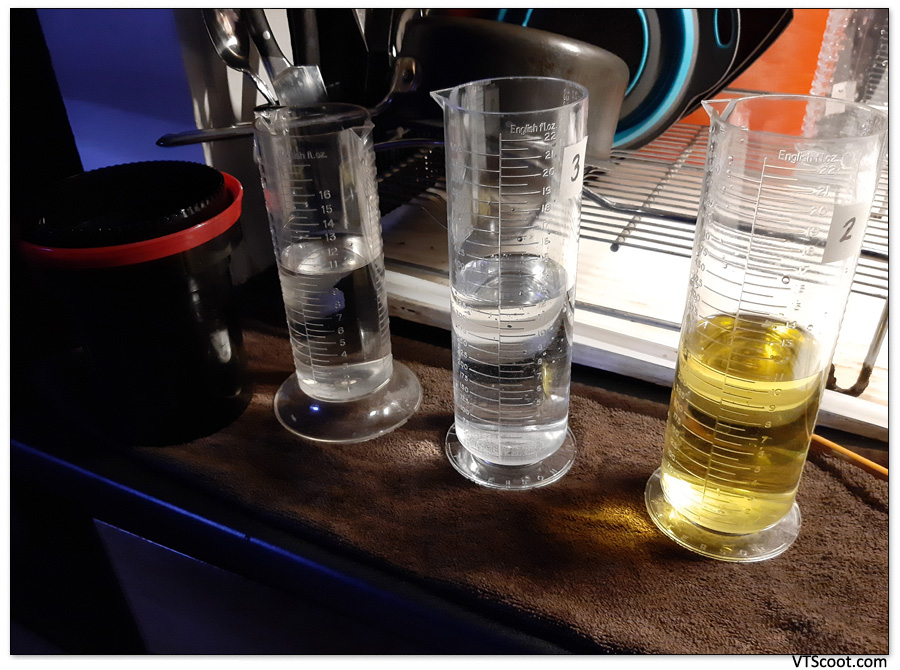
Temperature is important, as is the timing. How do I know how long to process? I refer to the Massive Dev Chart, of course. It’s a wonderful reference, you should bookmark it and tattoo the URL on your arm. Today I’m developing a roll of Ilford Delta 100, shot at “box speed” (not pushed or pulled) with a 1:1 dilution, I reference the chart and it tells me I need to develop it for 11 minutes. So I dump out the distilled water, pour in the D-76, start my stopwatch, tap a few times to release any bubbles, and agitate for 30 seconds, then for ten seconds every minute.
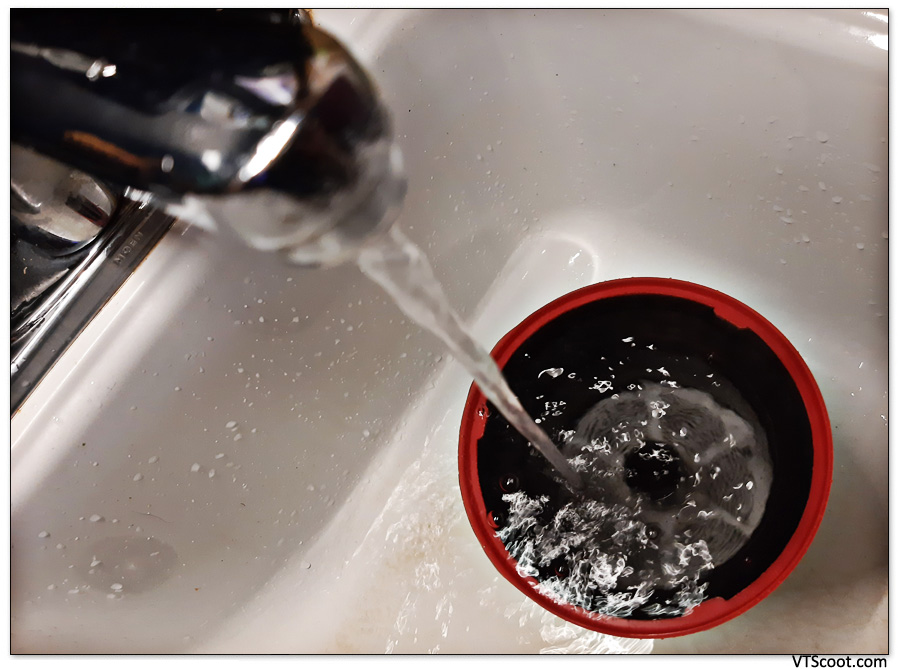
Pour out the developer and add the stop bath, which will smell like vinegar. Spin it around for a couple minutes, this will stop the developing process. You could also use tap water instead, but stop bath is cheap and lasts awhile. That finished, you pour in the fixer. I use Kodafix, because I love Kodak chemicals. Almost all my chemicals are Kodak, though lately I’ve been using the Ilford stop bath. You agitate the fixer the same way you did for the developer, and do it for ten minutes. Then a half hour rinse under a trickling kitchen tap. Afterward I use Photoflo to give the surface a bit less tension, allowing the water to run off cleaner, I squeegee off the excess water using two fingers and I hang the film in my bathroom for an hour to dry.
Why the bathroom? Less chance of dust particles settling on film. Your bathroom is the least dusty room in the house, most likely. Why two fingers instead of the cheap and easy film squeegees available online? Because those always scratch my film, leaving a line or two of scratched-off emulsion running the length of the film. Two fingers works best, and so long as you have fingers, it’s free.
After it’s dry I cut the film into four-frame sections and scan it. Easy. Be sure to use a little canned air, because there will be dust particles. They look like little white spots or squiggles on the scanned negative, and you can’t avoid them. Dust the scanner and film as best you can and for the rest you can rely on the Spot Healing brush in your photo editor of choice. I use Adobe Photoshop Elements.
I learned the process as a teenager, before the internet was a private tutor in everyone’s pocket. How? I honestly have no recollection. Probably Bob. He taught me most of what I initially learned. However there were some huge gaps in my education. It wasn’t until a few years ago that I learned what all the little numbers on a lens indicate. It was only last summer that I learned not all developers make negatives look the same. I feel like a huge portion of my photographic knowledge happened in just the last six or seven years, the internet being a much more powerful tool for self-education than the dusty old used books I had in my 20’s.
The convenience of being able to drop off my film and pay six or seven bucks to do the developing for me is a nice option, however the joy I get from doing it myself is something beyond mere convenience. You shoot the pics without a digital screen showing you the results, you develop them equally blind, hoping you did everything correctly with both. When I open the tank and look through the strip as I pull it from the plastic reel, seeing the individual rectangles of exposure still feels like magic.